

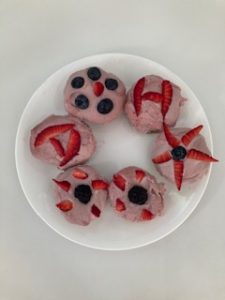
Kids love treats! But after a summer of ice cream and popsicles, you might be ready to try something different. Treats are fun but feeding kids food that sustain them for their days at school is even better. Looking for a sweet treat to make with your kids that is healthy, delicious, and doesn’t require an oven? I highly encourage you to try this No-Bake Strawberry Cheesecake recipe. These tarts are vegan, paleo-friendly, gluten-free, dairy-free, and kid approved. My kids love to make and decorate them with me– it’s a family affair.
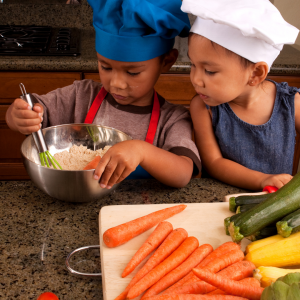
There are so many benefits to getting your kids in the kitchen with you. Spending time in the kitchen with your kiddos establishes lifelong skills, gets them excited about trying new foods, and ensures you’re spending quality time together. I believe so strongly in this effort that I’ve previously written about getting kids in the kitchen.
Alright, onto this dairy-free cheesecake recipe I promised!
No-Bake Strawberry Cheesecake Tarts
(Vegan, gluten free, dairy free)
Inspired by recipes from Detoxinista and Erin Holt Health

Ingredients

For the crust:
• 1 cup walnuts
• ¼ cup unsweetened shredded coconut
• 2 tablespoons maple syrup
• 1 tablespoon coconut oil, melted
• ¼ teaspoon sea salt

For the filling:
• 1 12-ounce bag frozen strawberries, thawed
• 1.5 cups raw cashews
• ¼ cup coconut cream *
• ¼ cup water
• ¼ cup maple syrup
• 2 tablespoons coconut oil, melted

fresh sliced strawberries and blueberries for decoration (optional)

* Place the canned coconut cream in the fridge ahead of time so the coconut cream is solid to scoop.

Tools Needed:
Muffin tin
Muffin liners
Food processor or blender
Measuring cups and spoons

Instructions

To prepare the crust:
1. Line a muffin tin with 8 parchment or silicone liners.

2. Place the walnuts and shredded coconut in a food processor and process until ground. Make sure not to over process or you will get nut butter instead!

3. Add the maple syrup, coconut oil and salt and process until mixed.

4. Scoop the dough into the muffin liners. Use your fingers to press down and form a crust. Place the tin in the fridge while making the filling.

To prepare filling:
5. Combine all the filling ingredients into a blender, and blend until smooth and creamy.

6. Remove the tin from the fridge and pour batter evenly into each cup.

7. Smooth the top of the batter. Press fresh berries onto the top for decoration.

8. Return the tin to the fridge to set overnight.

9. Keep frozen until serving. Enjoy!
Are looking for fun ways to get your kids more involved in the kitchen? I have you covered. I’m offering virtual “Kids in the Kitchen with Misa” cooking classes this fall. Check out Misa’s Clean Kitchen for dates and more details.
Looking for more healthy, tasty, and nutrient dense recipes? Here are a couple of DIY popsicles to try with your kids as well as a fun way to involve your kids by creating a snack board which can easily be adapted for Friday night dinner with minimal dishes and minimal cooking, which is always a win in my book.


